Rennie Scaysbrook | June 5, 2019
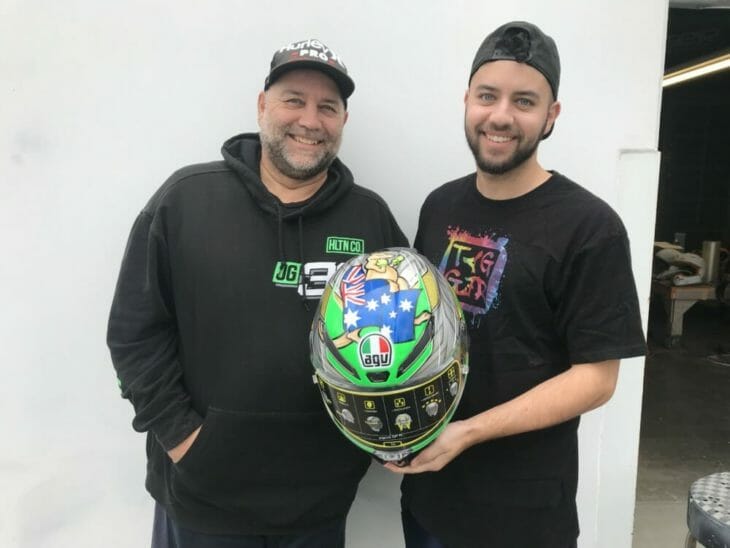
Tag and his son Bronson Gasperian from Lake Elsinore-based Tagger Designs custom helmets have just unveiled a stunning design for my fourth attempt at the Pikes Peak International Hill Climb. This year, I decided to go for a real Australian theme, rather than the Formula One-inspired design of late German driver Stefan Bellof I’ve been using for the previous two years.
 Tag (left) and Bronson Gasperian with Rennie’s race lid. They put over 20 overs of paint time into that thing!
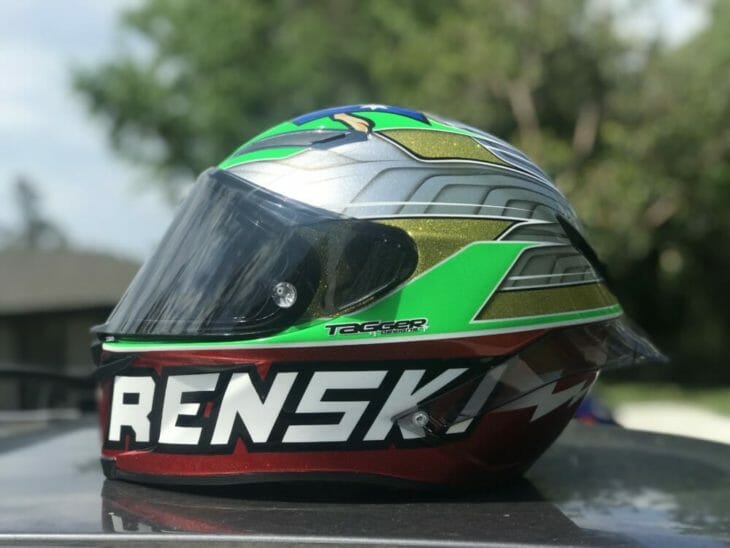
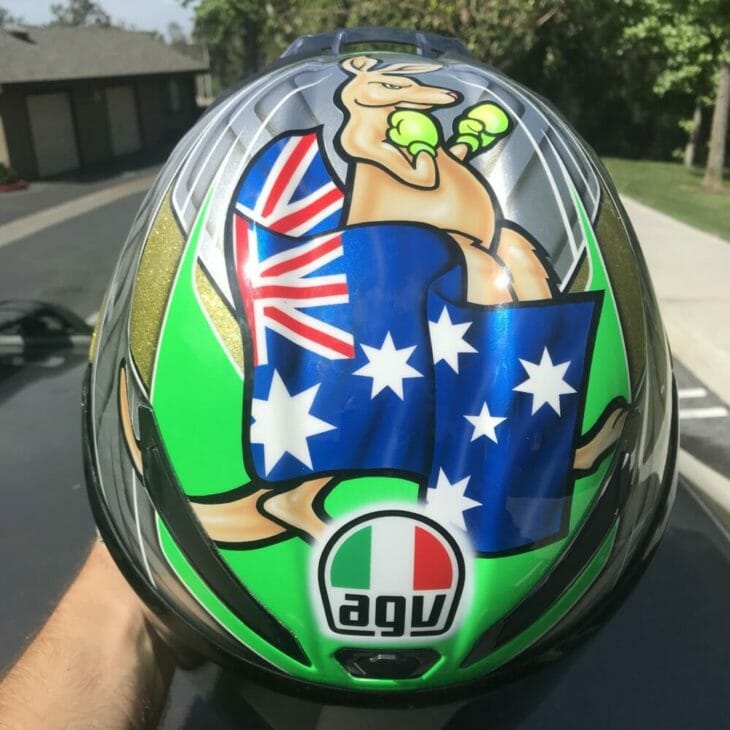
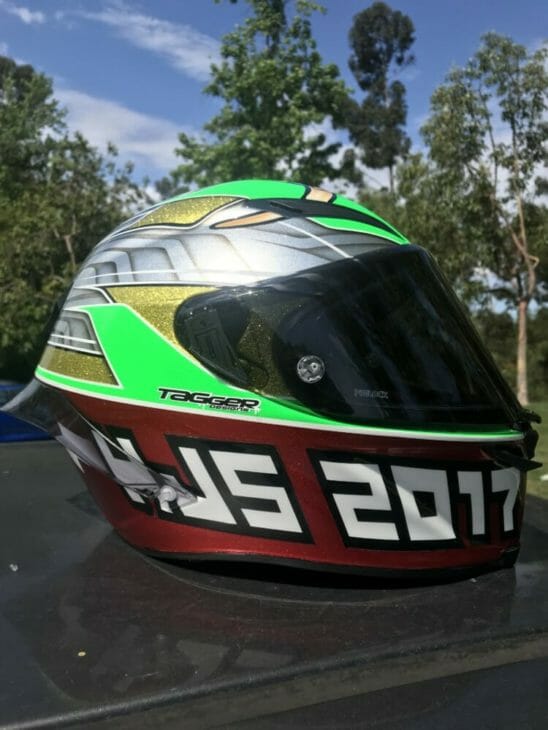
Tagger painted that design, too, but when I told him he could have free reign on this year’s race lid—the beautiful AGV Pista GP R Carbon—and let his creative juices flow, his eyes lit up. My only stipulation was it needed “Renski”, “HJS 2017” and an Aussie flag with the Boxing Kangaroo on it. Ahead of him was a lot (a lot!) of work, but I’m absolutely stunned at the result.
“Something this intricate takes around 20 hours of painting time,” Bronson says, indicating that number does not include the preparation time. “We use House of Colors for the paint itself, which is a lacquer-base paint, but it’s certified for California to use. In a lot of states, you can use the old school automotive paints, but we can’t use them in California.”
So, what is exactly involved in painting a helmet like this?
“When we first get the helmet, we take it apart as much as we can,” Bronson starts. “We take out all the inners, all the pads, and then mask up everything that’s not getting painted. Then we have a fresh canvas. When you mask off all the vents and whatever you need to, you have to paper all the insides and secure everything with tape and make sure there’s no open holes or air because any place there’s air, you can get paint in. You just want to make sure everything’s snug and taped off, sealed. Then we go ahead and sand the helmet.

“As this helmet is a gloss finish, we use red Scotch-Brite pads. If it was a matte helmet, we would need to use sand paper, usually 400 grit wet sandpaper.
“Then after that we’ll just clean it off and base coat the first color. This helmet started off black for the outlines on the chin bar logos and some of the pin lines.”
Once the black base coat was done, Bronson and Tag drew out the Australian flag and the kangaroo, which was then masked up to allow the design to be created around it.
“You can either do it that way or last,” Bronson says. “It’s better to do the flag and kangaroo first because when you tape all the lines, if you do the artwork last, you’ll see all the lines through the paint.”
With the flag and kangaroo covered up, a white coat comes next. White is always used first, as it brings out the ‘pop’ in the neon colors.
“It’s white for the rest of the helmet, inside the lettering on the chin bar and all the points and the other pin lines,” says Bronson. “You spray the whole helmet white, get it like a pure white everywhere, or else you’ll have dry spots or the white won’t look bright. You have to make sure you spray it evenly so everywhere looks good.”
Clearing, filling in and pinstriping
Next, the first of four clear coats are sprayed. Then the kangaroo and flag is painted in, and then comes the pinstriping. “Then you start filling in the colors of each section that you want to do,” Tag says. “It’s super gnarly. There’s a lot of steps involved.”

When we move onto the candy red. There’s a silver paint that goes on first, then silver flake, and finally the red on top of that. Three steps for essentially one color.
That’s a recurring theme for the paint. For every color—lime green, candy red, gold flake—there’s a base color underneath. For the silver, that came after the first clear coat. “The silver, then the fade around the AGV logo, and finally the Tagger Designs logo goes after the first clear after it gets wet sanded,” says Bronson. “Your first clear goes on and then we let it dry overnight. Then we wet sand it in the morning and do the final touches, the touch-ups before the final clear. Then it’s two more coats of clear.
“You can barely feel the edges of the tape lines, in the transitions between colors. Mostly you can feel it on the flake because the flake is the deepest part of the design. If you don’t wet sand it, like a lot of painters, you feel all those edges and they’re really sharp. Plus, the helmet will chip up so much faster if you don’t wet sand it and do another clear coat.”
This is a very condensed overview of how Tag and Bronson designed and painted my helmet. To mark out every step here would have you reading for hours, but the optimal thing to understand is almost everything is done by hand.

“It’s all hand-painted, pretty much,” says Tag. In all, including the 20 hours or so of painting, you’re looking up to 30 hours of labor from start to finish for one of these.
As for what those words mean on the sides, the right of “HJS 2017” stands for my son Harvey’s birth year, with “Renski” on the left my usual nickname from Australia.
Tag and Bronson have made something I seriously treasure. It’s one I’ll be keeping in the family—or on the mantelpiece—for a generation to come. I can’t wait to take it up America’s Mountain.
If you’d like a bit of a laugh, I tried to paint a helmet back in 2017. It didn’t go well. Click here to read the article.