Rennie Scaysbrook | April 1, 2016
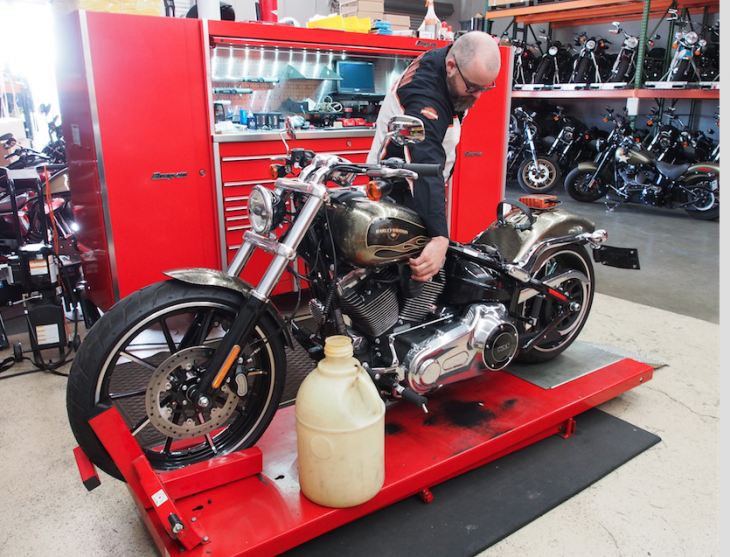
The craziness of the Cycle News lifestyle over the last two months has meant our dearly beloved Harley-Davidson Breakout long-term testbike hasn’t seen enough action. The black and gold beast’s been sleeping for the most part, and this didn’t sit well with us.
It dawned on us that it was time to go big straight away. We have some bling bits (as if the beast wasn’t bling enough), but those will be fitted at a later date. What we wanted was more power. More grunt. And the only way to get that was to fit up a bitchin’ Screamin’ Eagle 110c.i conversion kit!
Fitting up a Screamin’ Eagle kit is a lot easier than what it once was. The $1849.95 kit (not including labor) comes supplied direct from H-D and is a straight bolt-on – there’s no machining involved, meaning a skilled tech can get the job done in about six hours. It includes 4 inch bolt-on cylinders, forged 10.2:1 compression pistons and rings, SE-585 cams, perfect fit pushrods, SE high capacity roller tappets, high performance valve springs, heavy-duty clutch spring and a top end gasket kit.
This is a condensed version of fitting up a Screamin’ Eagle 110c.i kit.
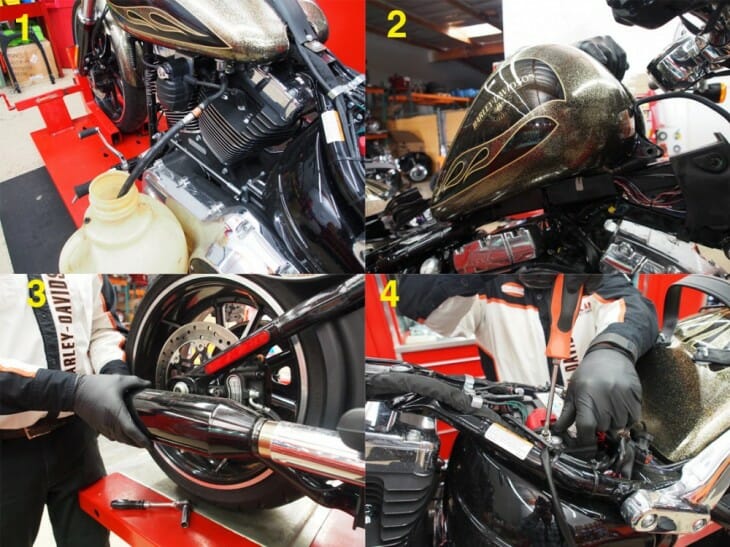
Drain the fuel (1), remove the gas tank (2), disconnect the battery (3) and remove the O2 sensor and exhausts (4).
This is a fairly simple process. We ran the gas pump via the H-D diagnostic equipment to get as much gas as possible out, then took the battery out. The standard battery is pretty heavy – maybe a lighter lithium ion battery should be in the works?
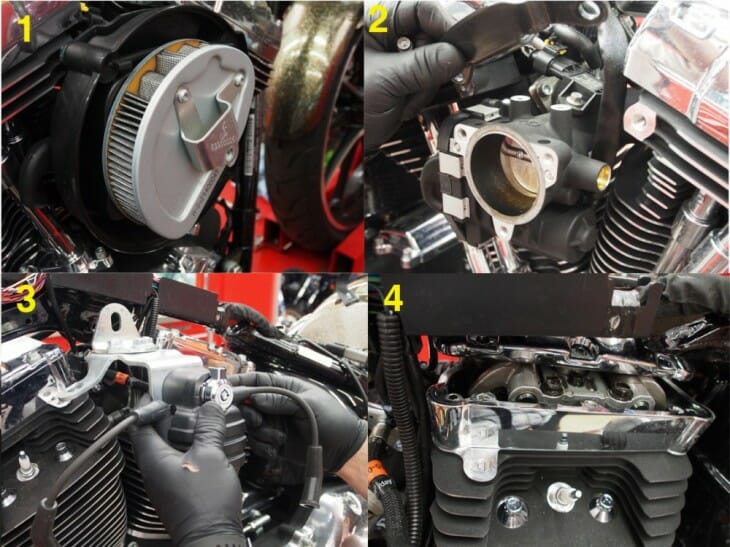
Remove the air filter cover and box (1), take off the throttle body (2), the ignition switch (3) and the rocker covers (4).
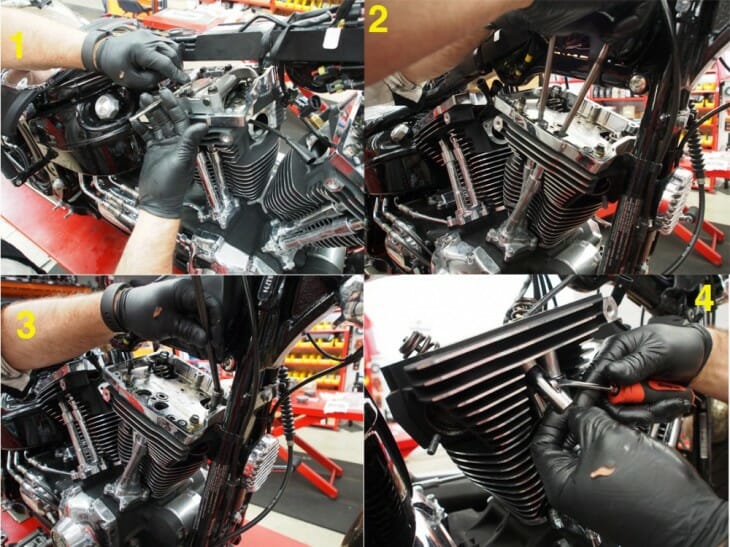
Remove the rocker arm assembly (1) and push rods (2). Remove the bottom of the rocker cover box and outer four cylinder head bolts (3) and the push rod collar/guides.
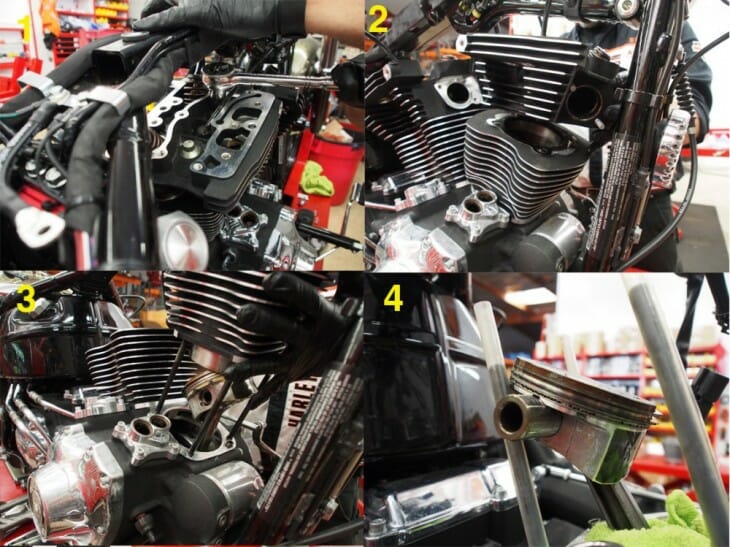
Crack and remove the final cylinder head bolts (1), remove the cylinder heads and gaskets (2), the cylinders themselves (3) and the piston circlip, pin and piston (4).
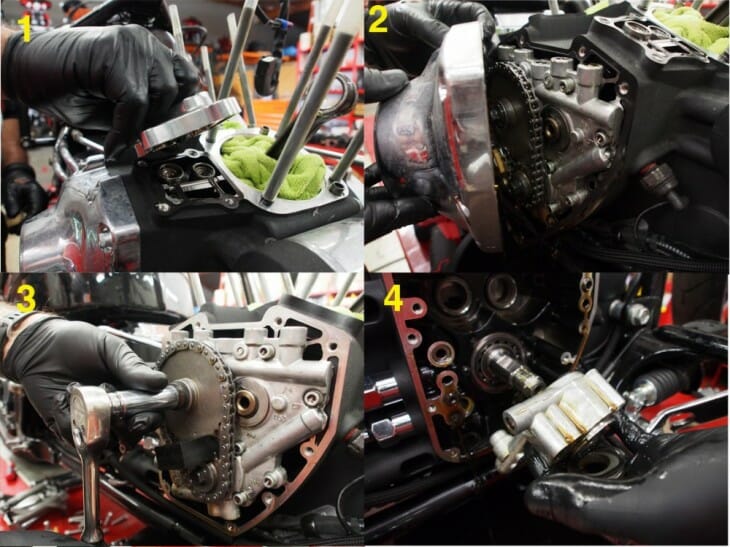
Remove the lifter covers (1), remove the cam chain cover (2), lock the sprockets and remove the cam chain tensioner, sprockets and cams (3), remove the oil pump (4).
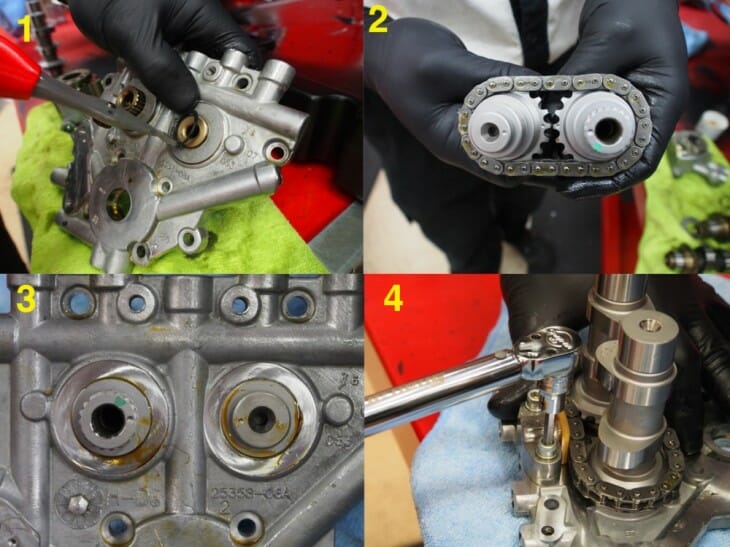
Remove the circlip holding the old cams to the plate and take out the cams (1). Fit the new cams that come with the Screamin’ Eagle kit – these cams have higher lift and longer duration that standard. Fit the chain around the new cams and line up the internal and external dots (you can’t see the internal dots once the cam plate has been fitted (2)). Refit the cams to the plate and check the external dots line up (3). Refit the chain tensioner (4).
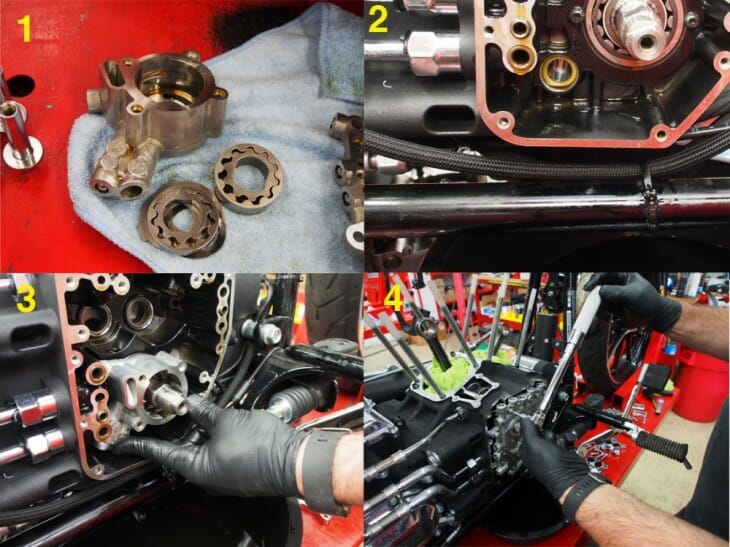
Reassemble the oil pump (the larger gear on the right is for scavenging while the smaller gear on the left is for the oil feed) (1). Replace the yellow seal for the oil pump feed in the engine case (2). Refit the oil pump (3). Refit the cams and torque to specs (4).
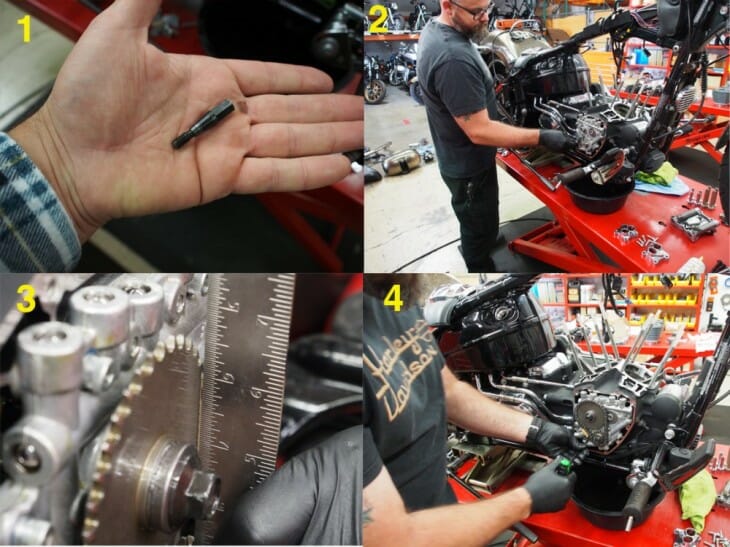
Fit the coned bolt (a Harley-Davidson special part) to the oil pump, raise the back of the bike and rotate the rear wheel in gear. This will help align the oil pump cams. Remove the coned bolt and fit standard oil pump bolts and torque to 100 in-lb (1 and 2). Refit the cam sprockets with the original spacers and bolts. Check the clearance with a straight edge. If the edge doesn’t line up with the sprocket, you’ll need a larger spacer. In our case, the Breakout had a 0.000130in spacer, we needed 0.000140in. Fit new spacer and lock cams (3 and 4). Torque to specs.
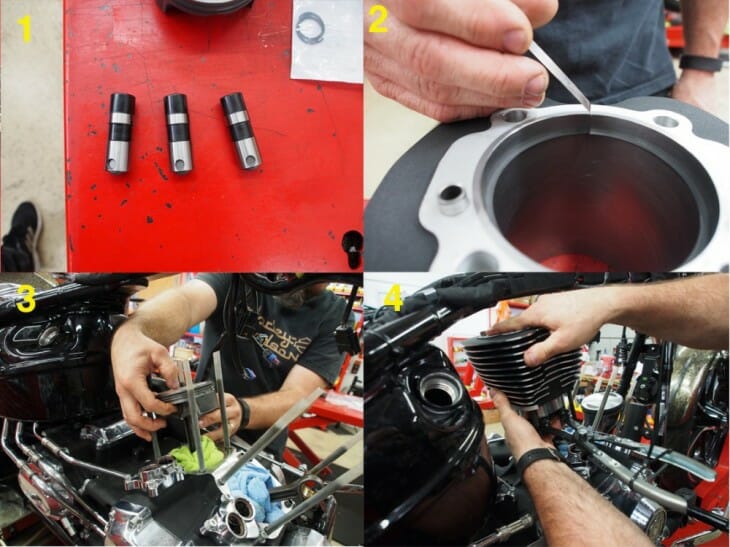
Fit new Screamin’ Eagle lifters and oil to aid initial start up, then refit the lifter covers, gaskets and O-rings and torque to specs (1). Check the ring end gap on the new Screamin’ Eagle piston rings. They need to be between 0.010-0.016 for the top ring, 0.017-0.028 for the second ring and 0.006-0.026 for the oil control ring (2). Fit the new Screamin’ Eagle high-comp pistons, piston pin, circlip, rings (3). Fit new Screamin’ Eagle cylinders (4).
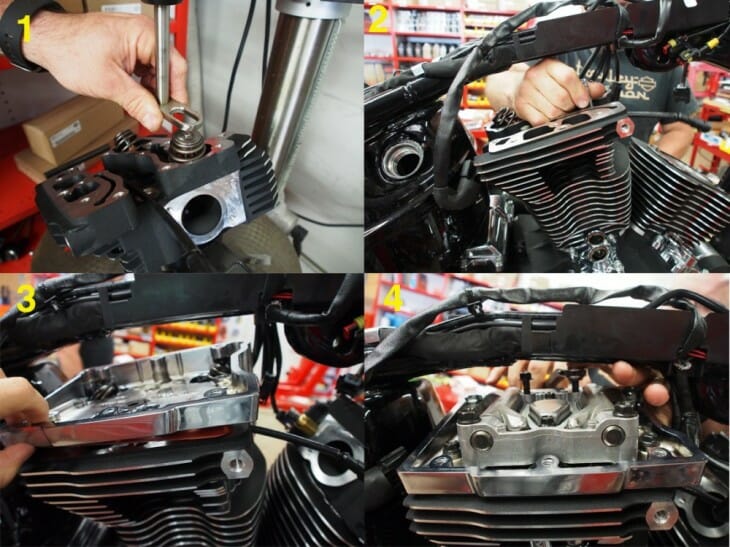
Replace valve springs with new heavier Screamin’ Eagle units and replace valve stem seals (1). Refit the standard cylinder heads and torque to specs (2). Refit the rocker box base (3). Refit the pushrod guides and fit new Screamin’ Eagle pushrods and O-rings and fit the rockers and covers and torque to specs (4).
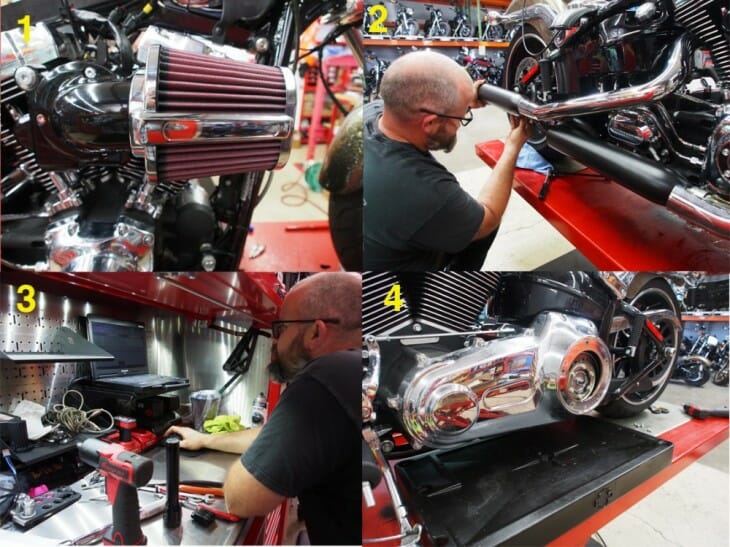
Refit throttle body, ignition switch, air filter base, and Screamin’ Eagle Heavy Breather intake and filter (1). Refit exhaust headers and new Screamin’ Eagle Shorty mufflers and end caps (2). Refit and refill gas tank, battery, and calibrate ECU for 110c.i kit (3). Fit the Screamin’ Eagle heavy duty clutch spring required for the 110c.i kit (4).
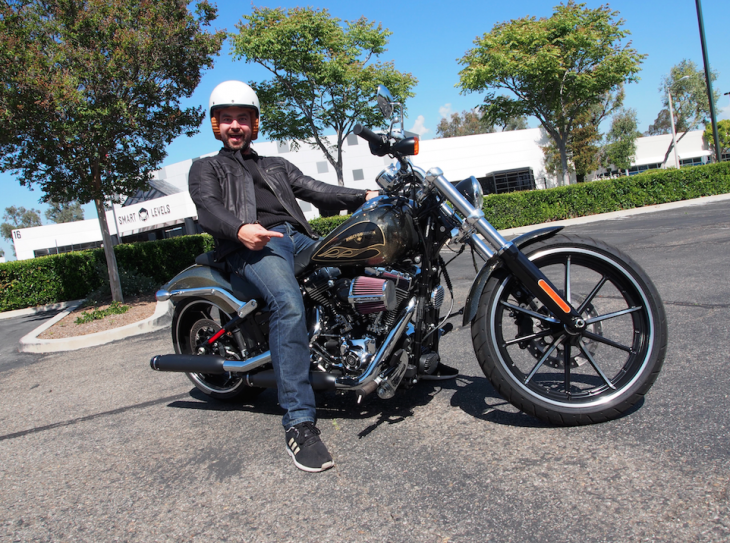
Fire it up! If you’ve got someone as skilled as Alan Barsi from H-D doing the work for you, it’ll fire first time. Harley claims the 110c.i kit gives about 20hp and 25lb-ft of torque increase. We’ll report back after a few rides to give you a run down on just how it feels!